PowerShell: Connect To Microsoft Graph
Posted on: January 17th, 2025
There are several ways to connect to Azure and Azure-adjacent portals through a command-line. You have Connect-AzureAD, Connect-AzAccount, Connect-MsolService, etc. This article is about my personal favorite, the one I, an Identity Engineer specializing in Azure and automation, use almost every day; Connect-MgGraph. This cmdlet uses (you guessed it) the Graph API to connect you to your Microsoft cloud environment.
What is the Graph API?
Graph is a unified endpoint, granting you access to various Microsoft cloud services. Entra ID, SharePoint, OneDrive, Teams, Exchange; these can all be managed and queried programmatically with Graph. While Graph is powerful and has a broad scope, not all aspects of your Microsoft cloud ecosystem can be managed with it. Azure IaaS, for example, will have you connect with the Az module's Connect-AzAccount. Graph is also a powerful integration tool, allowing developers to work with users and data in your tenant with the use of application objects (which we will briefly look at momentarily), scoped with specific permissions to prevent overreach.
Now that we have a base understanding of what the Graph API is, we'll combine it with our favorite Swiss Army knife from our tool belt, PowerShell. There are a few dozen sub-modules of Microsoft Graph currently available. Connecting will solely rely on the Microsoft.Graph.Authentication module, though I recommend installing the main module, Microsoft.Graph, which will automatically include the entire suite of modules. Beware, it may take some time to complete. Refer back to my article on Module Management if you need some tips on installing and keeping track of your modules.
Preliminary Setup: Application Registration
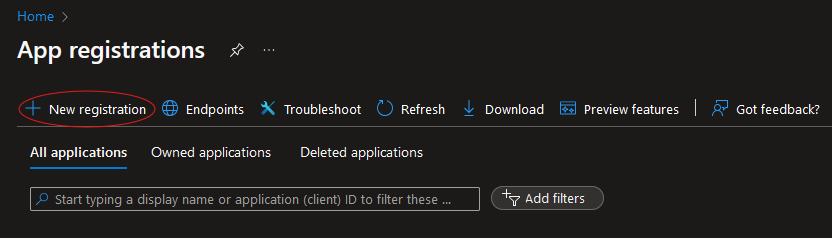
Before we connect and explore the power of Graph PowerShell, we need to set up our entry point. We will be creating an application object, an Application Registration, and configure it to let us connect. We'll also go over a few ancillary steps that you may find important. Log in to your Azure or Entra portal with an administrator account. If you are in a PIM-enabled environment, be sure you have at least Application Developer rights activated. Application Administrator and Cloud Application Administrator will also do, as well as Global Administrator if you're an enjoyer of privilege creep. Navigate over to the Applications blade. If you aren't sure how to get there, use the search bar at the top to search for "app registrations" and click on App Registrations to open that blade. Click "+ New registration" to get started.
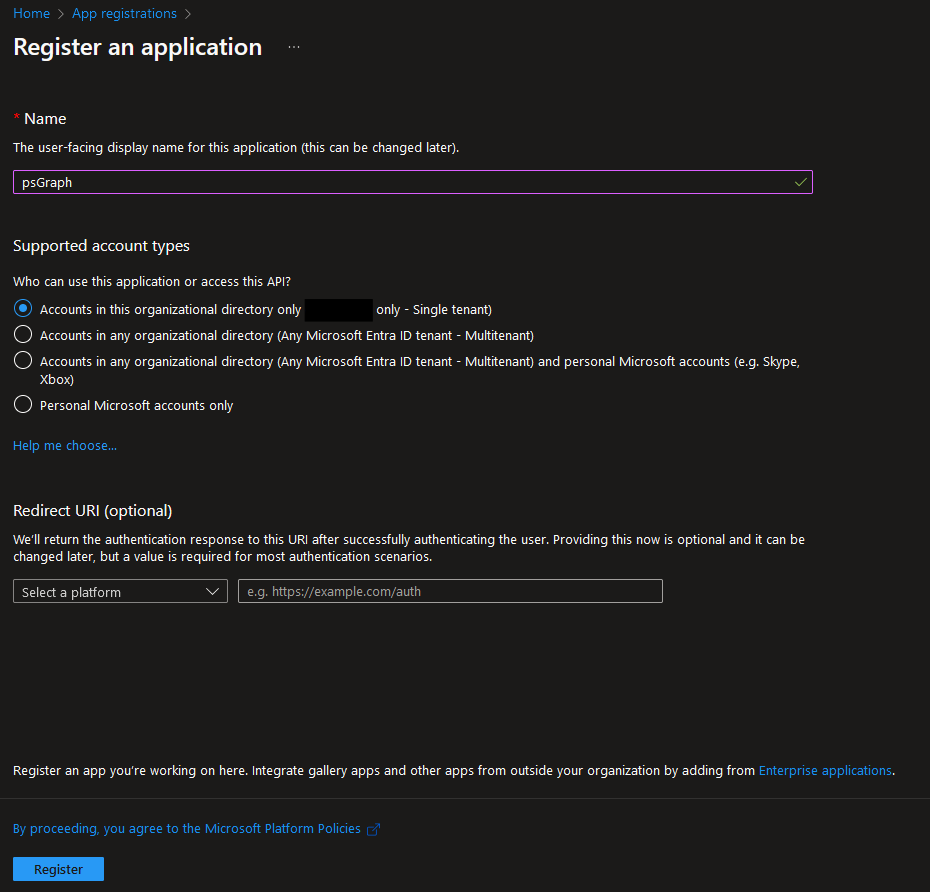
Give your application object a name. It does not have to be unique, though I recommend it be. Otherwise, you'll have to rely on the ID values to quickly differentiate. You may also specify the type of accounts that can access this app object. We will keep it as a single-tenant app to restrict access to our own tenant. You could set your redirect URI here, but we will visit that in a moment. Go ahead and leave it blank for now.
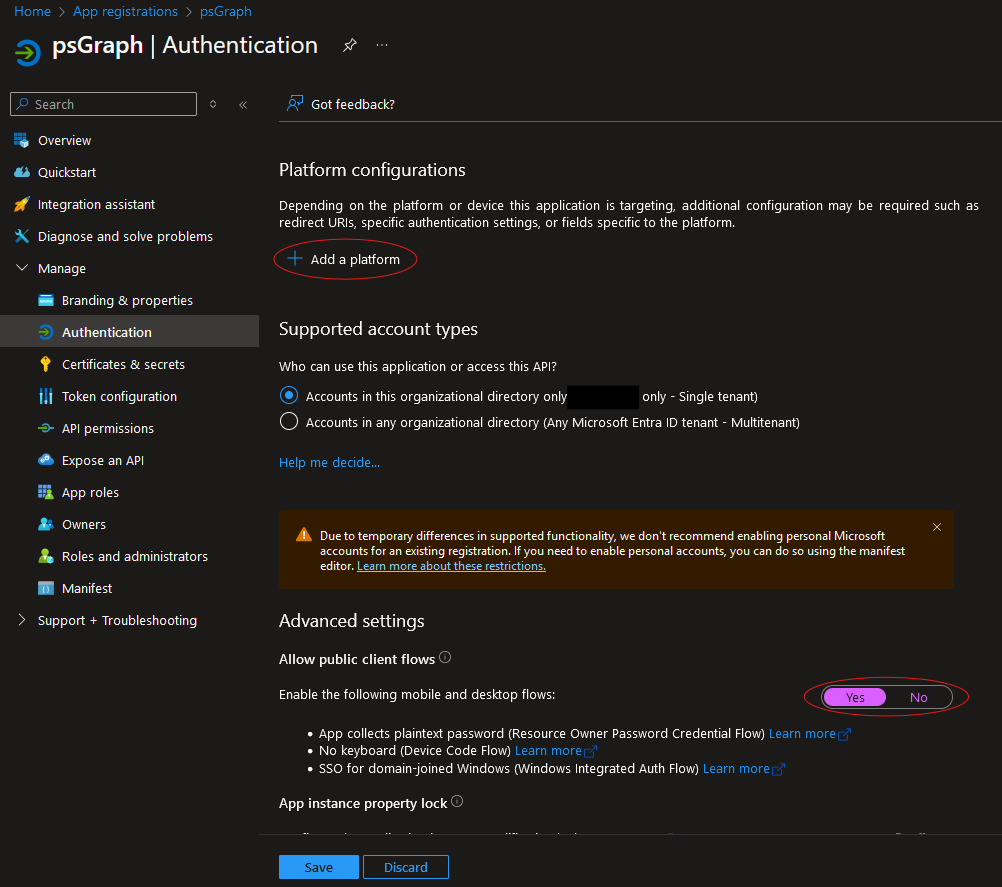
Once created, you'll find yourself at the Overview of your new app object. Go to the Authentication tab along the left. Near the bottom, enable public client flows under Advanced Settings. This will allow authentication to be accepted directly from a client system without there being a deeper backend authentication service. In this case, this will apply to our desktop. Note that this will allow connection without client secrets and limiting the devices that can be used to connect will largely rely on something like Conditional Access policies. I'm partial to requiring an access assignment to users/groups. We'll visit that later.
Scroll back up to the top to Platform Configurations to add your redirect URI. Click "+ Add a platform", select mobile and desktop applications from the list, add "http://localhost" to the custom redirect URIs textbox, and click the Configure button. You'll see your local host URI that you added and three others. This is alright. Click Save at the bottom if you haven't already.
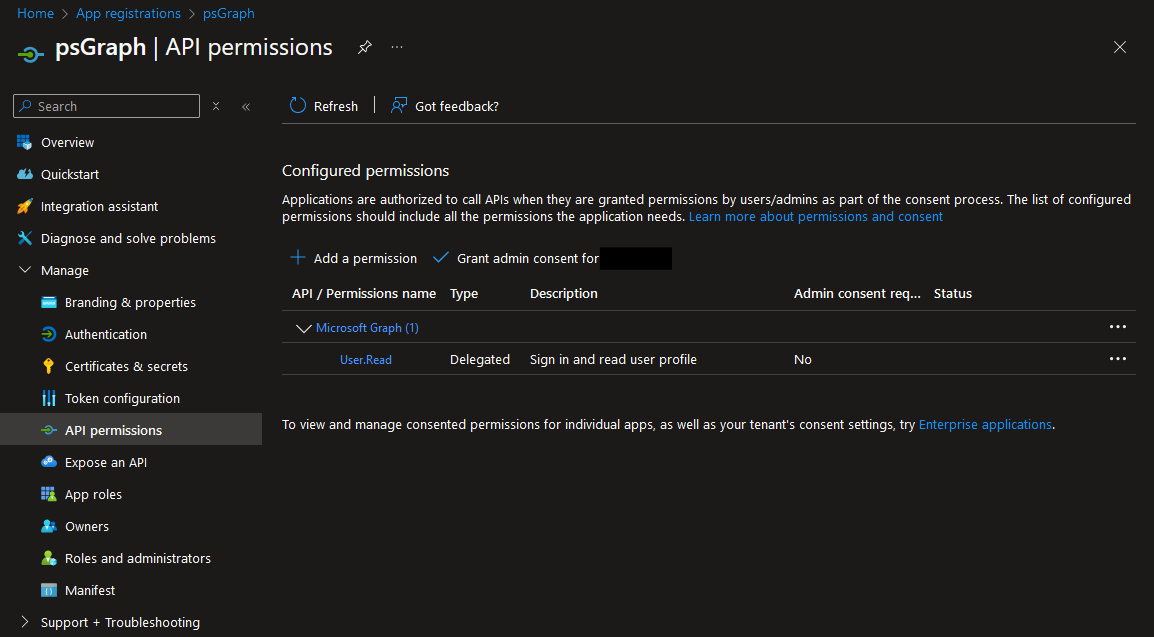
Technically speaking, you are ready to connect. Your app object is set up with an entry point that will support authenticating from your desktop. However, as it stands, you won't be able to do much. With your app registration still open, go to the API Permissions tab on the left navigation. You will see the default delegated User.Read permission already assigned. If you want to do more than query your own user object that you've authenticated with, you'll want to add more to this list. Use caution when adding these permissions and consider the use case before assigning too many permissions. Ideally, you are likely only doing in PowerShell what you would normally be able to do in the portals; we just want to avoid being click-ops admins.
When you click "+ Add a permission", you will see all the services you can manage with Graph. To use myself as an example, Entra ID is my second home so I will select Microsoft Graph at the top. You will see Delegated and Application permissions. Delegated permissions will only have the scope of the authenticated user. They work on behalf of the user. If you assign the app object User.ReadWrite.All under Delegated Permissions, but you authenticate as a user that doesn't have User Administrator capabilities or similar, you won't gain those capabilities. Application permissions, on the other hand, do not work on behalf of the user, they work on behalf of the app object. In that same scenario, adding User.ReadWrite.All under Application Permissions would grant an under-privileged user all the capabilities that come with that permission. After you add what you need, consider granting admin consent if any of the permissions specify it is needed. If you do not, you will need to consent each time you authenticate.
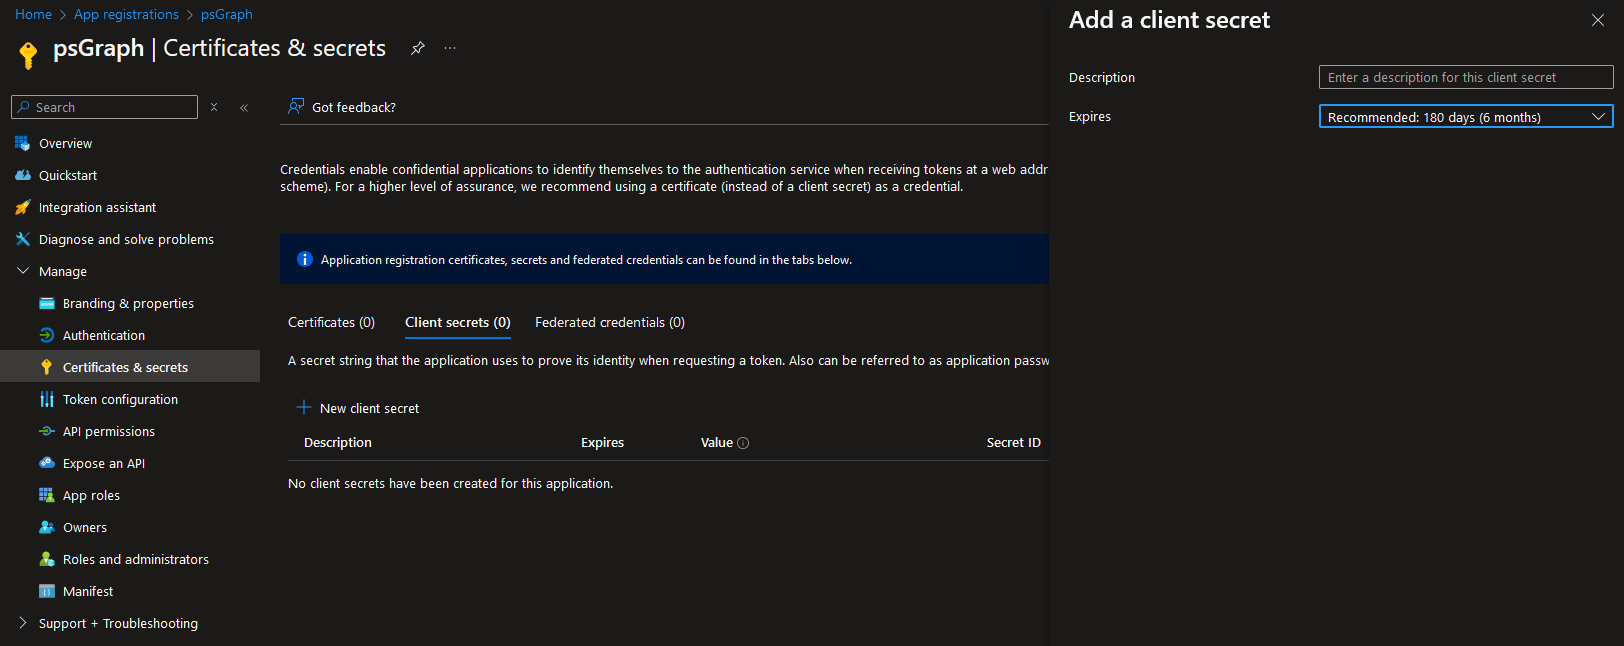
You likely are ready to connect at this point. If you do not want to authenticate as a user and would rather authenticate as the app object itself, you will need a client secret. Go to the Certificates & Secrets tab on the left navigation. Click "+New client secret", optionally enter a description and set your validity period, and take note of the Value that appears next to your new secret. Now is the time for an obligatory mention that passwords, which this secret value is the equivalent of, should never be baked into your scripts. Put this value into a key vault or password manager if you are able and pull it when needed.
An additional note, thinking back to delegated and application permissions, logging in as the app object will not give delegated permissions a user to act on behalf of. If you will be logging in as the application, assign some Application permissions. Continue to keep minimizing scope and privilege creep in the back of your mind.
One last important piece of access to mention before we get connected. Creating an app object will automatically create a service principal, or Enterprise Application, and vice versa. The service principal can be used to limit who can connect to this Graph entry point. Considering this is likely going to be used for administrative purposes, it's an important piece to consider configuring. Use the search bar at the top to search for Enterprise Applications, go to it, and then search for a service principal by the same name as the app object you just created. There are two steps we will want to take here: require assignment and set the users/groups that will have access.
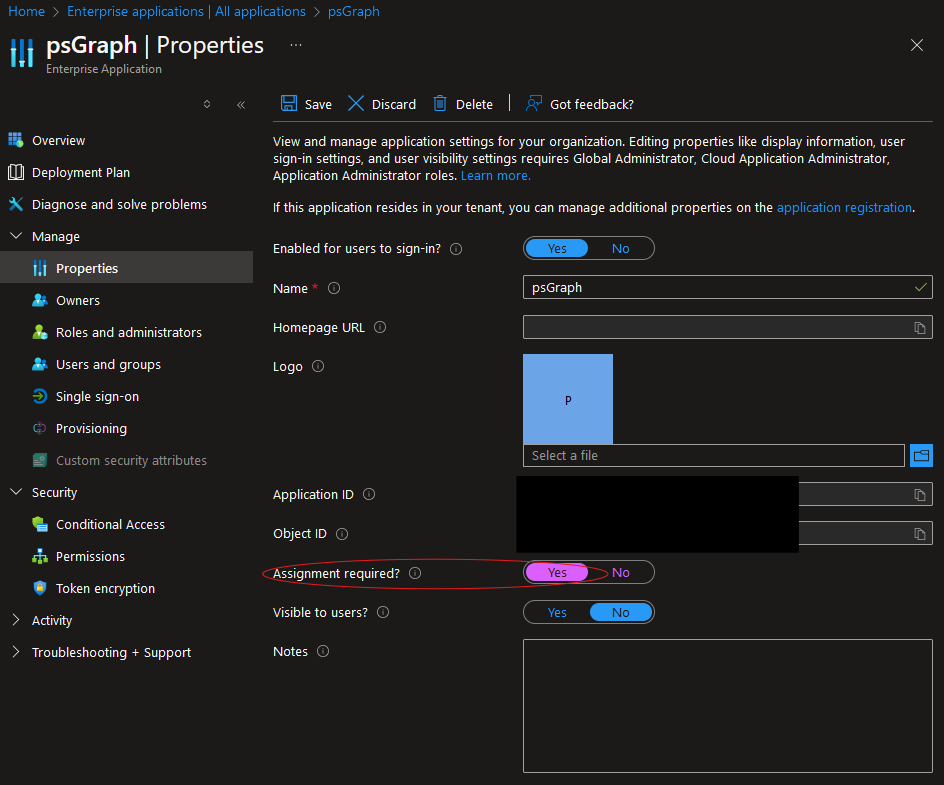
On the left navigation under Manage, go to Properties. You will see "Assignment required?" Change this setting to Yes and then save before moving to the next step. Leaving this at No will allow anyone within the scope of your specified account types (in our example above, anyone within our tenant) to authenticate to this. Changing this to Yes will block authentication from anyone not explicitly given access.
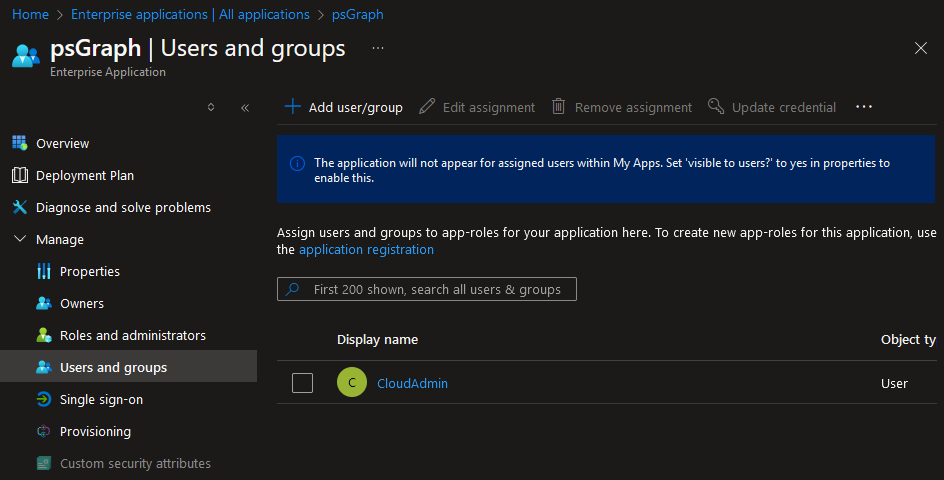
Granting that access is our next step. After you've saved in the last step, go to Users and Groups on the left navigation. You should already see yourself on the list. If you are the only one using this, you could skip ahead. Otherwise, click "+ Add user/group" and add the user(s) or group(s) that will be using this app object to connect with PowerShell. If assignment is required and an unassigned user attempts to authenticate, they will receive an AADSTS50105 error stating access has not been granted.
Making The Connection
Setup is complete! There are other things you can do and configure, but for our purposes we're set and we have some good security practices in place. Now we'll test our entry point. There are some things you should have at a minimum to make connection smooth, your Client ID and your Tenant ID. If you go back to your app object that you created, you will see your on the Overview your Application (Client) ID and your Directory (Tenant) ID. Copy these values and make them variables or include them in your Connect-MgGraph line directly. Tip: Include -NoWelcome to omit the MOTD style message you get when connecting.
### Connect to Graph with Tenant ID and Client ID
$tenantId = 'XXXXX'
$clientId = 'YYYYY'
Connect-MgGraph -TenantId $tenantId -ClientId $clientId -NoWelcome
If you have many permissions assigned to your application object and want to limit the scope of your script, you can do that with the -Scopes parameter. Add a single permission or create a static array with multiple permissions specified.
### Connect to Graph with Tenant ID, Client ID, and Scope
$tenantId = 'XXXXX'
$clientId = 'YYYYY'
$scope = @(
    'User.ReadWrite.All',
    'Group.ReadWrite.All'
)
Connect-MgGraph -TenantId $tenantId -ClientId $clientId -Scopes $scope -NoWelcome
If you are connecting with your client secret, you will need to include that value and combine it with your Client ID into a PSCredential as shown below.
### Connect to Graph with Tenant ID, Client ID, and Scope
$tenantId = 'XXXXX'
$clientId = 'YYYYY'
$clientSecret = ConvertTo-SecureString -String 'ClientSecretValue' -AsPlainText -Force
$secret = New-Object System.Management.Automation.PSCredential($clientId,$clientSecret)
Connect-MgGraph -TenantId $tenantId -ClientSecretCredential $secret -NoWelcome
Getting Session Details
You can check your session details with Get-MgContext. The output will give you information such as your Client and Tenant ID, scope, UserPrincipalName, and some other potentially useful information. This can be referenced in your script in ways that can be helpful. One example that I like to include on my email generating scripts is pulling the Account attribute, which holds your UPN, and using that to get a User ID to use for Send-MgUserMail. In this example, it does not matter who is authenticated, their ID value will be obtained without their input.
### Show session context
Get-MgContext

### Example: Get User ID, without manual input and regardless of who is authenticated. Use to send email
$myUpn = (Get-MgContext).Account
$myId = (Get-MgUser -Search "UserPrincipalName:$myUpn" -ConsistencyLevel eventual).Id
$mailParams = @{
    .....
}
Send-MgUserMail -UserId $myId -BodyParameter $mailParams
Disconnecting
Once you're all done, you can disconnect using Disconnect-MgGraph. Disconnecting will output the session context you are leaving. There isn't a -NoWelcome style parameter to use here but you can suppress that output by piping to Out-Null.
### Disconnect from Graph
Disconnect-MgGraph | Out-Null
Conclusion
Leveraging Graph in PowerShell is a powerful and convenient way to work in Microsoft's cloud platforms. Take all the benefits you get from PowerShell in any scenario and apply it to the cloud. Getting a session going is your first step. It's a simple yet important process that you will want to think through as you set up your app object and make use of the cmdlets; connecting, making use of the session context if useful, and disconnecting when finished.